Make your own album pages in Word
Several members have indicated that they are forced to keep their stamps in stock books. Necessarily because they feel that the collection would be better off in a nice album, but they don't like the layout of the preprint albums or they find the album sheets too expensive. However, there is a solution for this: make your own album pages. Organize them as you like on sheets of paper of your choice.
A fellow member of my other stamp club (not the MFN) explained during a club night how to make such pages yourself on the computer. For that he uses Microsoft Word, part of Microsoft Office. With this program it is "easy" to design and fill a page using text boxes.
Now the "problem" is that MS Word has changed over the years due to the many additions and modifications. I installed Microsoft Office 2010 (Dutch version) on my computer, so the procedure shown below is for that version of the package. But the basic principles remain the same, you will only have to search a bit to find the corresponding function if you have a different Office / Word version.
In the text the English nominations are used with the Dutch equivalent (as visible in the screen shots) between square brackets.
Fisrt step is to make a basic document: an A4 sized album page.
Step 1. Open Microsoft Word (in my case thus Word 2010)
Step 2. Make a new document when this is not automatically done:
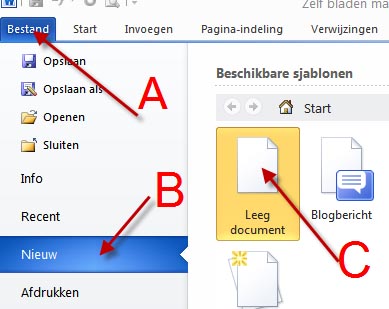
A. select File [Bestand]
B. next choose New [Nieuw]
C. select Blank document [Leeg document]
Now we have a new, blank document that we lay out completely at own choice, and later fill in.
Step 3. Lay out the page by clicking on the tab Layout [Pagina-indeling]:
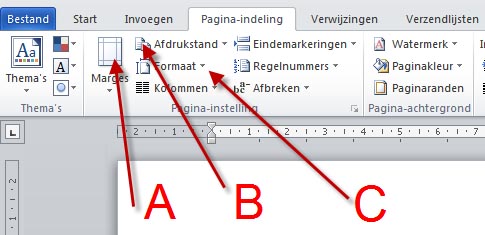
A. select Margins [Marges] and set up the desired margins
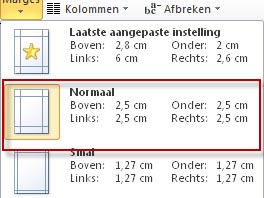

Wide margin
Narrow margin
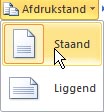
B. select Orientation [Afdrukstand] and choose Portrait [Staand]
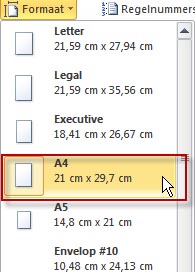
C. as last choose Size [Formaat]; A4 is the standard (European) format for printing paper and is mostly used.
Now we have defined an album page. The next step is to make an outline around the page.
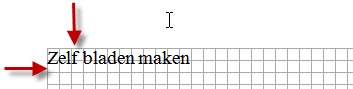
Tip: by clicking in the top menu bar on View [Beeld] and check the box Gridlines [Rasterlijnen] it is possible to fill the working space of the sheet on the screen with a grid.
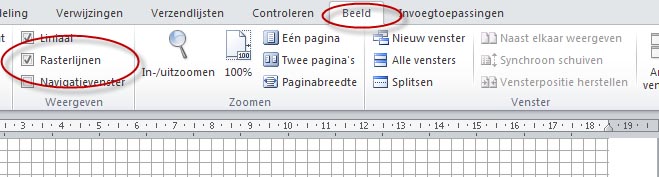
These gridlines will not be printed on the final paper sheet. This auxiliary grid can be handy, for instance to get a series of stamps on 1 line. Or to put stamps exactly beneath each other to obtain a compact page filling.
Step 4. Make an outline around the page
The outline can be created by making a text box that spans the complete working space of the page.
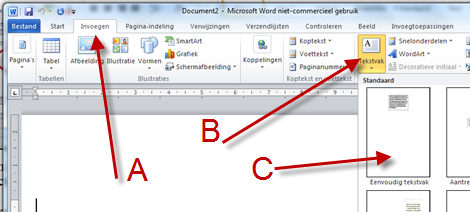
A. select Insert [Invoegen] in the top menu bar
B. choose Text Box [Tekstvak]
C. choose Simple Text Bow [Eenvoudig Tekstvak] - or in some MS Word versions Standard Text Box
Now MS Word puts a small text box somewhere in your working space (in some versions filled with a certain text between square brackets). You can easily customize this box to your own preferences:
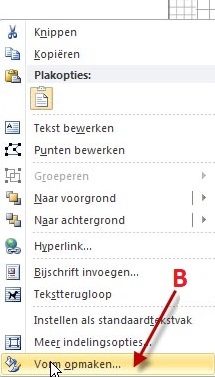
A. Go with the cursor (mouse) to the outline of the box you just made and click with the left button to select the box
B. Next click with the right mouse button, what makes a menu appear where you can change the properties of the text box by clicking on Format Shape [Vorm opmaken]
For us some of these properties are interesting:
Fill [Opvulling]: standard the box has a solid white background, what makes it non-transparent: eventual text or other text boxes that are (partly) covered by the new outline are not visible.
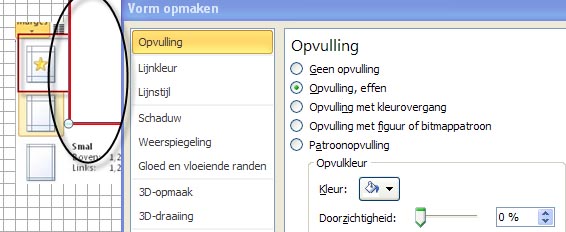
Text Box with white background
If you want to change this, choose No fill [Geen opvulling]. Another solution is to choose for Transparency [Doorzichtig] 100% (partly transparent is also possible).
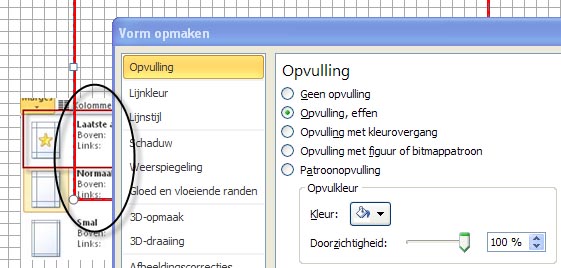
Text Box without background filling
Line Color [Lijnkleur]: Standard the outline of the text box is black. With this option you can change this.
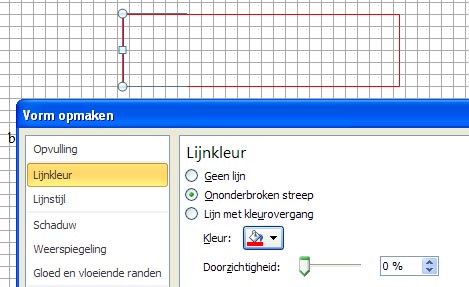
Line Width [Lijn Breedte]: To emphasize the outline box you can choose to make the lines wider than the outlines around the boxes for stamps and postal stationary.
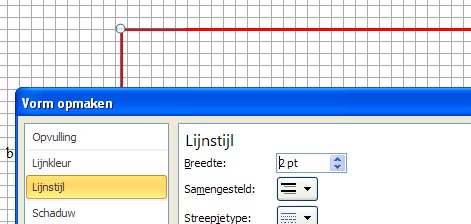
Apart from that you can change for example the Line Style [Lijnstijl], or make a shadow behind the box to create a 3-D effect. Look carefully at the possibilities that your own Word version offers. Don't be afraid and experiment with it, if you don't like the result you can always go a step back or start again!
Now if you place the cursor on a line around the text box and click the left mouse button you can, by putting the cursor on a corner mark or a square in the middle of a line, stretch the box and enlarge it so that is spans the complete working space.

With the following result:

Tip: it is possible that the text box automatically jumps to the center of the page. To prevent this, you have to choose for Horizontal Position [Horizontale Positie] (just search a bit where this is in your Word version - most times it is somewhere under Layout) Absolute position right to Page (or to Margin), or Relative to Page (or toMargin).
Now the set-up of the album page is ready. You can safeguard this basic page by storing it as file, and use this file as start for every new album page. On the new album page you can make several text boxes for stamps, blocks and other items you want to show on the page in the same way as described above. Of course you can also type some text around the boxes.
Personally I find it handy to store every album page as a separte file. In case of a modification you only have to adapt this page.
Tip: when you want to have several boxes on one page, you can make 1 text box to your own preferences and multiply this by Copy and Paste. After the pasting you can of course adapt size and position (and eventually other properties) of every individual box.
Example of an album page:
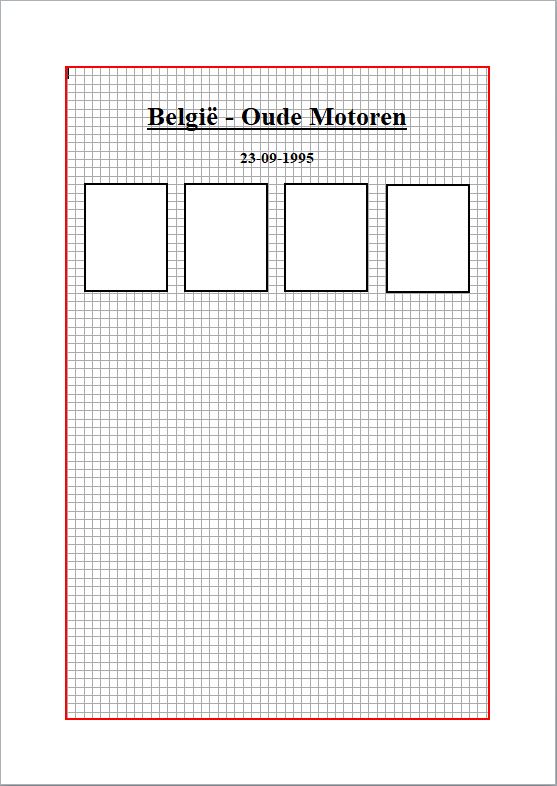
This is how it looks on the screen in MS Word.....
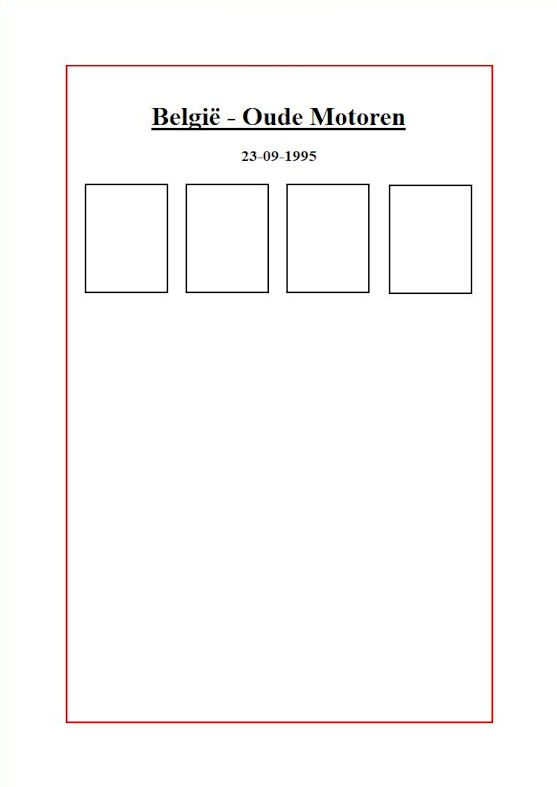
and this is how it is printed
Nico Helling
Top - Back to former page - Home |